Want to know how to set up a Linksys Range Extender then go through this article, it will help you.
There are two methods for the user which are provided by Linksys, among which you can choose as per your network capability, to set up a Linksys Range Extender. These two methods are:
We will discuss various steps involved in setting up Linksys range extender through both of these methods but before that let’s see on some basic requirements that a user has to confirm before initiating setup wizard.
Basic Requirements:
In this method, the user needs to operate various steps manually, that is why it is named so. Steps engaged in setting up Linksys range extender using manual method includes:

Wi-Fi Protected Setup may be used to set up a Linksys range extender in two ways. That is:
It is all based on the user's want by which method they want to install their extender.
1) Pressing the WPS button manually: -
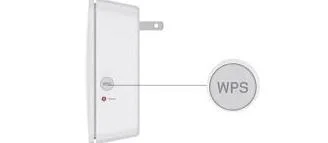
As the name suggests, under this, the user needs to manually press the WPS button present on the extender. By this extender will attempt for WPS connection. At this time press the WPS button of your router.
Through this WPS LED on your extender will get stabilized, that indicates a successful WPS connection. And you can connect to Linksys extender’s network using any client device.
2) Use web-based web-page i.e. http://extedner.linksys.com
Within this method, the user will be provided with three options. You can choose among them as the need may be. These options are:
Wi-Fi Protected Setup button
To this, the user is required to establish the connection between any client device such as computer and Linksys range extender. You can do this through using either Ethernet cable or through Wi-Fi mode.
And start the setup page. After getting login into the setup page, select Wireless and then Basic Wireless Settings
The third option is entering your PIN number as shown on your client device.
How to Connect Nintendo Wii to the Internet?
1 Jul, 2026
How to Download the Linksys Connect Software?
1 Jul, 2026
How to Login Linksys Smart WiFi Router?
1 Jul, 2026Copyright © 2026 Router Support 247 | all right reserved.
DISCLAIMER : Router Support 247 is an independent Technical Support Provider. We are not affiliated to any 3rd party brand unless specified. Call vendor for direct Support.
Top Searches in Linksys Support