First, we need to know about the Asus Router access point, Access points basically used to extend the Wi-Fi coverage area, and access points are used to increase the number of connected users and devices.
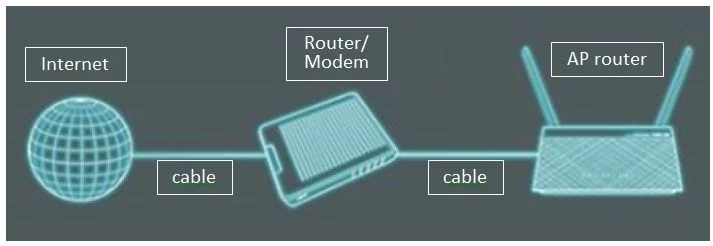
As we know access point router requires an Ethernet cable to connect to the parent modem or your router and this cable is used to transmit your wired network signals in wireless network signals.
Step 1: First you need to download a specified driver or install with using CD Drive
Step 2: After installing the driver, you will get the router icon on your desktop
Step 3: You need to connect your Asus router via its WAN port with the LAN port of your router, this specifies the physical connection of your Asus router with parent router
Step 4: Next when you click on the icon, which is situated on the desktop, now you need to go into the admin page, where you will see so many options to customize your Asus router functionality
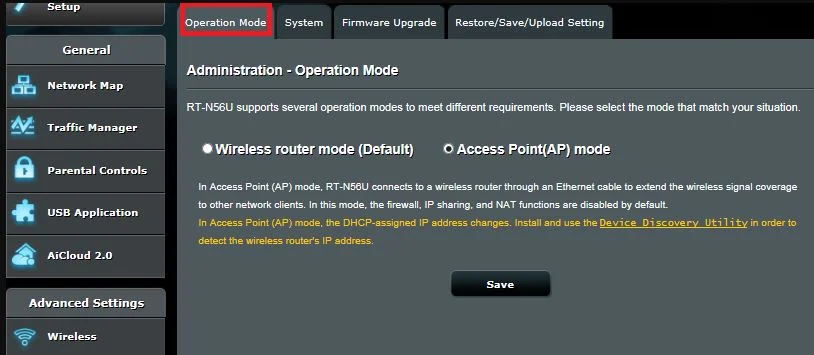
Step 5: Now you need to go to the admin page where you will see the administration option. Under the administration option, you need to go to operation mode.
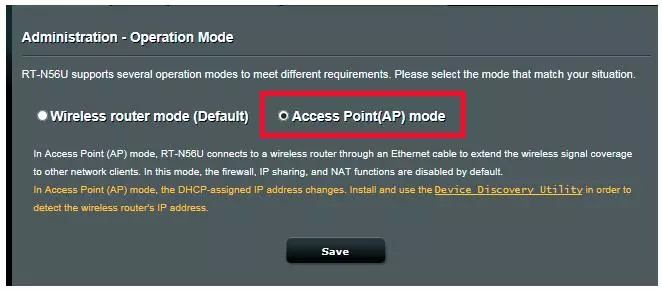
Step 6: Now you need to select the Access point radio button option and click on save
Step 7: Now you will be asked to enter your IP Address. When you click the yes button, IP Address details and other details will be filled in the section automatically, But if you want to insert these details manually, you need to choose the ‘no’ option and add all the details which are required to establish access points.
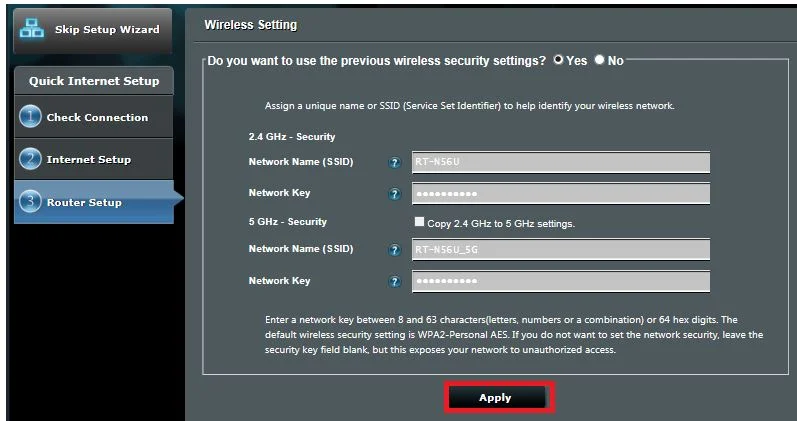
Step 8: Now you need to think about your new network name and password, Just assign a new network name and password.

Note: The best way to choose your password number and character, is if you choose your password with some special character and space might not work for some time and you will get an error message like a wireless printer failing to establish a connection.
Step 9: Once everything is set up perfectly, you need to click on the apply button to save all the settings which you have done so far.
Step 1: To take a backup of your router settings is a good thing, sometimes you are required to revert your settings, so you can revert your setting by easily seeing all these settings.
Step 2: To restore your default setting, you need to go to the third tab which is Restore/Save/Upload Setting
Step 3: Click on this third tab, and it will save all the settings in the form of a CFG file in your system.
Step 4: I advised you to save this CFG file on the cloud environment or some google drive location so that you can retrieve it easily
Step 5: On the next time, if you want to restore the settings with back iteration, simply you can upload by using the restore window.
These are the step-by-step procedure to set up the Asus router as an access point.
Asus is a very powerful Wi-Fi router that provides a 1.3 GHz speed on the band with a 5GHz frequency band and 600 Mbps on 2.4 GHz frequency. This is the best Wi-Fi router for the home network. In establishing a connection with any outside devices, we need to establish our existing router as an access point. So that other outside devices can access the internet.
How to Setup Asus Wifi 6 Router RT-AX3000?
4 Jul, 2026
How To Setup an Asus AX86U Gaming Router?
4 Jul, 2026
How To Reset ASUS Router Password?
4 Jul, 2026
Asus Router Stuck on Firmware Downloading?
3 Jul, 2026
How to Setup the Asus RT AC68U Wireless Router?
3 Jul, 2026
How to Login into Asus RT N66U Router?
3 Jul, 2026Copyright © 2026 Router Support 247 | all right reserved.
DISCLAIMER : Router Support 247 is an independent Technical Support Provider. We are not affiliated to any 3rd party brand unless specified. Call vendor for direct Support.

Top Searches in Asus Support